

Hey there! I'm a supplier of reverse osmosis systems, and I'm stoked to share with you how to install a reverse osmosis system. Whether you're looking to get cleaner water at home or in a small business, this guide'll walk you through the process step by step.
Why Go for a Reverse Osmosis System?
First off, let's talk about why you'd want a reverse osmosis system in the first place. These systems are pretty amazing at removing a whole bunch of contaminants from your water. We're talking about things like lead, arsenic, fluoride, and even some bacteria. They use a semi - permeable membrane to filter out the bad stuff, leaving you with water that tastes better and is generally healthier to drink.
At our company, we offer three main series of reverse osmosis systems: the Basic - RO Series Reverse Osmosis Water System, the Medium - RO Series Reverse Osmosis Water System, and the Smart - RO Series Reverse Osmosis Water System. The Basic - RO is great for small households on a budget. It gets the job done and provides decent filtration. The Medium - RO is a step up, offering more advanced filtration and better flow rates, perfect for larger families or small offices. And the Smart - RO? Well, it's the top - of - the - line. It comes with smart features that let you monitor water quality and system performance right from your phone.

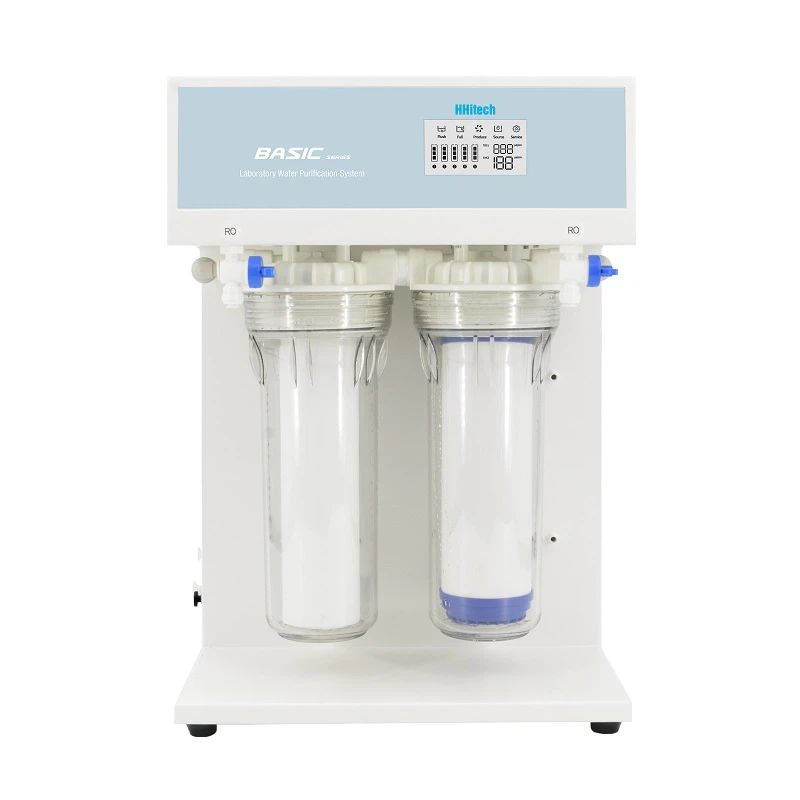
What You'll Need Before You Start
Before you start the installation, you'll need to gather a few tools and materials. Here's a quick list:
- Reverse osmosis system kit: This'll come with all the main components like the membrane, pre - filters, post - filter, and storage tank.
- Adjustable wrench: You'll use this to tighten and loosen nuts and bolts.
- Teflon tape: It helps create a watertight seal on threaded connections.
- Drill and drill bits: If you need to make holes for the faucet or the system components.
- Bucket: To catch any water that spills during the installation.
- Pipe cutter or scissors: For cutting the tubing that comes with the system.
Step 1: Choose the Right Location
The first step in installing your reverse osmosis system is to find the right spot. You'll want to pick a place that's close to a water source, like an under - sink cabinet. It should also be near an electrical outlet if your system has a pump. Make sure the area is level and has enough space to accommodate the storage tank and all the components.
Step 2: Shut Off the Water Supply
Once you've found the location, turn off the main water supply to your house. This is super important to prevent any water from gushing out while you're working on the installation. You can usually find the main shut - off valve near your water meter.
Step 3: Install the Faucet
If your reverse osmosis system comes with a dedicated faucet, it's time to install it. You'll likely need to drill a hole in your sink or countertop. Use the drill and the appropriate drill bit to make the hole. Then, insert the faucet through the hole from the top and secure it with the mounting hardware from the bottom. Wrap the threads of the mounting nut with Teflon tape before tightening it to prevent leaks.
Step 4: Connect the Tubing
Now it's time to connect the tubing. The system usually comes with different types of tubing for the inlet, outlet, and drain. Start by connecting the inlet tubing to the cold water line under the sink. You may need to use a saddle valve, which clamps onto the cold water pipe and has a small valve that allows water to flow into the reverse osmosis system. Wrap the threads of the saddle valve with Teflon tape and tighten it with the adjustable wrench.
Next, connect the tubing from the system to the storage tank. Make sure the connections are tight but don't over - tighten, as it could damage the tubing.
Step 5: Install the Filters
The reverse osmosis system has pre - filters and a post - filter. The pre - filters are designed to remove larger particles like sediment and chlorine before the water reaches the membrane. The post - filter further polishes the water after it comes out of the membrane.
Install the pre - filters first. They usually have a color - coded system to make it easy to tell which one goes where. Simply screw them into the filter housings and tighten them by hand. Then, install the post - filter in the same way.
Step 6: Connect the Membrane
The membrane is the heart of the reverse osmosis system. It's where the magic happens, filtering out the contaminants. Connect the tubing from the pre - filters to the membrane housing. Make sure the connections are secure and use Teflon tape on the threaded connections.
Step 7: Connect the Drain Line
The reverse osmosis system produces wastewater as it filters the water. You'll need to connect the drain line to a suitable drain, like the sink drain or a floor drain. Use a drain saddle or a tee fitting to connect the drain line to the drain pipe. Again, use Teflon tape on the threaded connections.
Step 8: Fill the Storage Tank
Once all the connections are made, it's time to turn the water supply back on. Slowly open the main water shut - off valve and let the water fill the storage tank. You may hear some gurgling sounds as the tank fills up. This is normal.
Step 9: Flush the System
After the storage tank is full, it's a good idea to flush the system. This helps remove any loose particles or air that may be in the system. Open the faucet and let the water run for about 15 - 20 minutes. You may notice that the water is cloudy at first, but it should clear up as you flush the system.
Step 10: Check for Leaks
Once you've flushed the system, check all the connections for leaks. Look for any drips or puddles under the sink or around the components. If you find a leak, tighten the connection with the adjustable wrench or add more Teflon tape.
Step 11: Test the Water
After you're sure there are no leaks, it's time to test the water. Take a glass of water from the reverse osmosis faucet and taste it. You should notice a difference in the taste and clarity compared to your regular tap water.
Tips for a Successful Installation
- Read the instruction manual that comes with your reverse osmosis system carefully. It has all the specific details for your particular model.
- Take your time during the installation. Rushing can lead to mistakes and leaks.
- If you're not comfortable doing the installation yourself, you can always hire a professional plumber.
Wrapping Up
Installing a reverse osmosis system may seem a bit daunting at first, but if you follow these steps, you'll have clean, great - tasting water in no time. And remember, if you have any questions or need help choosing the right system for your needs, don't hesitate to reach out. We're here to assist you every step of the way. Whether you're interested in the Basic - RO Series Reverse Osmosis Water System, the Medium - RO Series Reverse Osmosis Water System, or the Smart - RO Series Reverse Osmosis Water System, we can help you make the best choice.
If you're thinking about purchasing a reverse osmosis system, feel free to contact us for more information and to discuss your specific requirements. We're happy to help you find the perfect system for your home or business.
References
- General knowledge about reverse osmosis system installation.
- Manufacturer's instruction manuals for reverse osmosis systems.


